HOW TO INSTALL YOUR NEW AA TUNING E-PROM
| E36 ECU REMOVAL INSTRUCTIONS | |
|
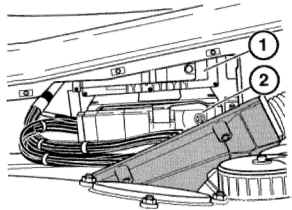
Open the hood Facing rearward looking towards the windshield. Focus to the upper left hand (passenger side) you should see a grayish soft foam cover, remove the (3) black plastic buttons that are on top. Pry out the plastic tab centers to remove plastic tabs. Remove insulated foam cover.
|
 |
|
Now you should see a hard plastic cover, remove the (4) top screws to remove cover. |
|
|
You will see the ECU box attached to a wire ECU labeled "1" is the automatic transmission computer. |
|
|
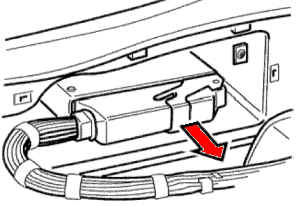
Pull it out, the ECU just slides out. If you are ordering a E-PROM, write down the last (3) #s of the BOSCH #s. Do not disconnect harness as yet. After ECU is removed completely, disconnect harness |
|
| READ THIS PROCEDURE FIRST BEFORE PERFORMING ANY FURTHER WORK. COMPREHEND AND UNDERSTAND. IF FEEL UNSURE, CONSULT A PROFESSIONAL. DAMAGE TO THE ECU CIRCUIT BOARD CAN OCCUR. |
|
|
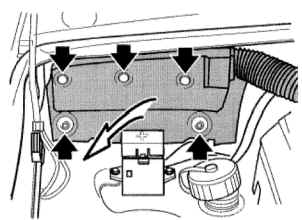
93-95 ECU #413, 506 On the top side of the ECU you should see(2) stickers and 6 little bolts. Now you should see the inside of the ECU. NOTICE: Before removing the E-PROM, note the divot on the side of the E-PROM CAREFULLY take off the chip, use a de-magnetized flat head screwdriver (thin as possible) and SLIDE it CAREFULLY under
the chip. Install the AA E-PROM, aligning the divot to the same side as the old one. Carefully insert the e-prom pins into the holes Forcing the pins will only break off the tabs
|
92-93 ECU #402,403,413 Looking at the ECU from top with the BOSCH labels. There are (4) torx screws. DO NOT PUSH ON THE CORNERS OF THE UPPER CIRCUIT BOARD. IT CAN BREAK. -Be careful, the circuit board should -Gently slide the circuit board away from the plug housing. This is the hardest part, but it will separate. Now you should see the inside of the ECU. NOTICE: Before removing the E-PROM, note the divot on the side of the E-PROM CAREFULLY take off the chip, use a de-magnetized flat head screwdriver (thin as possible) and SLIDE it CAREFULLY under
the chip. Install the AA E-PROM, aligning the divot to the same side as the old one. Carefully insert the e-prom pins into the holes Forcing the pins will only break off the tabs |